At NearZero Discovery, we use Microsoft 365 Advanced eDiscovery tool to help our clients to respond to the legal matters or their internal investigations. This tool provides an end-to-end workflow to preserve, collect, analyze, review, and export content that is responsive to the regulatory requests, investigations, and litigation.
Office 365 Advanced eDiscovery and Licensing
To access Advance eDiscovery, a proper licensing is required. Licensing for Advanced eDiscovery includes the organization’s subscription and per-user licensing. The organization must have one of these subscriptions to access Advanced eDiscovery in the Microsoft 365 compliance center:
- Microsoft 365 E5 or Office 365 E5 subscription
- Microsoft 365 E3 subscription with E5 Compliance add-on
- Microsoft 365 E3 subscription with E5 eDiscovery and Audit add-on
- Microsoft 365 Education A5 or Office 365 Education A5 subscription
To add a user as a custodian in an Advance eDiscovery case, that user must be assigned one of the following licenses (depending on the organization subscription):
- Microsoft 365:
- Microsoft 365 E5 license, an E5 Compliance add-on license, or an E5 eDiscovery and Audit add-on
- Microsoft 365 Frontline users must be assigned an F5 Compliance or F5 Security & Compliance add-on
- Microsoft 365 Education users must be assigned an A5 license
- Office 365:
- Assigned an Office 365 E5 or Office 365 Education A5 license
To find out more about subscriptions and licensing, click here: Advanced eDiscovery Subscriptions and licensing
Below you can see a screen shot of comparison table about licensing and available “eDiscovery and auditing” features in different subscriptions:

Office 365 Advanced eDiscovery and Appropriate Permissions
To access Advanced eDiscovery or to be added as a member of an Advanced eDiscovery case, a user must be assigned the appropriate permissions. Also, for users to start creating and using cases, organization-wide settings should be configured properly. After setting up Advanced eDiscovery, user with the proper permission can create a case.
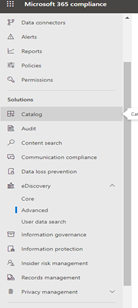
Office 365 Advanced eDiscovery Location
You can find Advanced eDiscovery tool, in the left hand of the page, under eDiscovery in Microsoft 365 compliance center landing page.
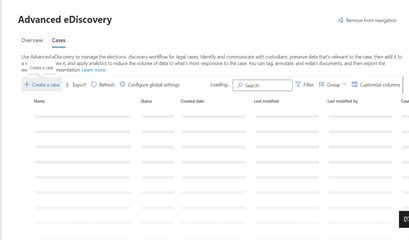
Creating a Case in Office 365 Advanced eDiscovery
After clicking Advanced under eDiscovery in Microsoft 365 compliance center, you can see a tab to create a case:
To create a case, there are two formats available:
- Large case (1TB per collection) (Preview)
- Normal case (300GB per collection)
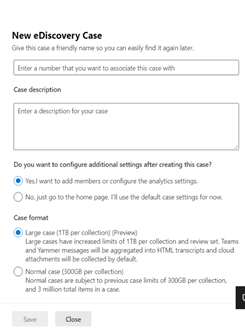
If you choose the large case, the option to export content as Loose files and PSTs (in export tab) is not currently supported in large cases (the option is greyed out). Also, the Advanced indexing that occurs when you add custodians and non-custodial data source to a case is not currently supported in large cases. To see more details, read: Use large cases in Advanced eDiscovery
Adding Data Sources
To add data sources to a case, there are two ways:
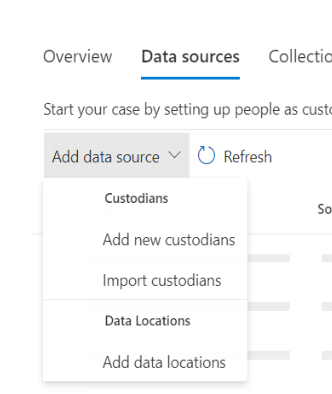
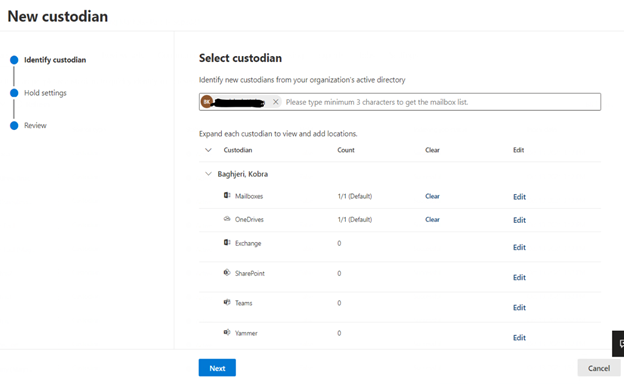
1. Add new custodians: identify the custodian by email address or name or last name from organization`s active directory.
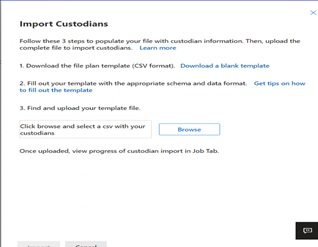
2. Import custodians: add custodian with a CSV file. It gives you a blank template in CSV format and tips on how to fill out the template , and you should follow the tips with custodian information in CSV file: Import custodians to an Advanced eDiscovery case
During adding data sources, it is important to know your list of the locations: Mailboxes, OneDrives, Exchange, etc. You can use your default or edit the locations in this step and if you are going to apply a hold on the custodian during adding the data sources or later.
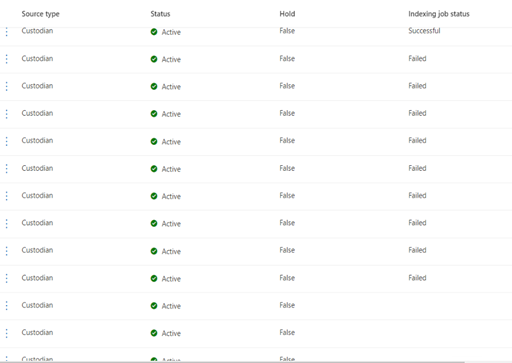
Importing custodians as a CSV file is fast and works well. However, you need to have the correct email address of each custodian and fill the details about hold, location. From our experience at NearZero Discovery, it can cause lots of issues in indexing. Indexing jobs may fail or not to show any status and it just accepts the email format. If you have some inactive boxes in the environment with another format, you will receive an error for them. The following screenshots show how to Import Custodians, CSV file and fields, and status of imported custodians using a CSV file.

Next week, we will be reviewing more features and limitations in Advanced eDiscovery such as review sets and other lessons learned.
Would you like to learn more about our services? Email [email protected] or call 289-803-9730. We would be happy to share more details about our self-service or fully managed eDiscovery services!


